Solar panel installation: step-by-step process
From site survey to permission to operate, the real timeline, not the brochure version.
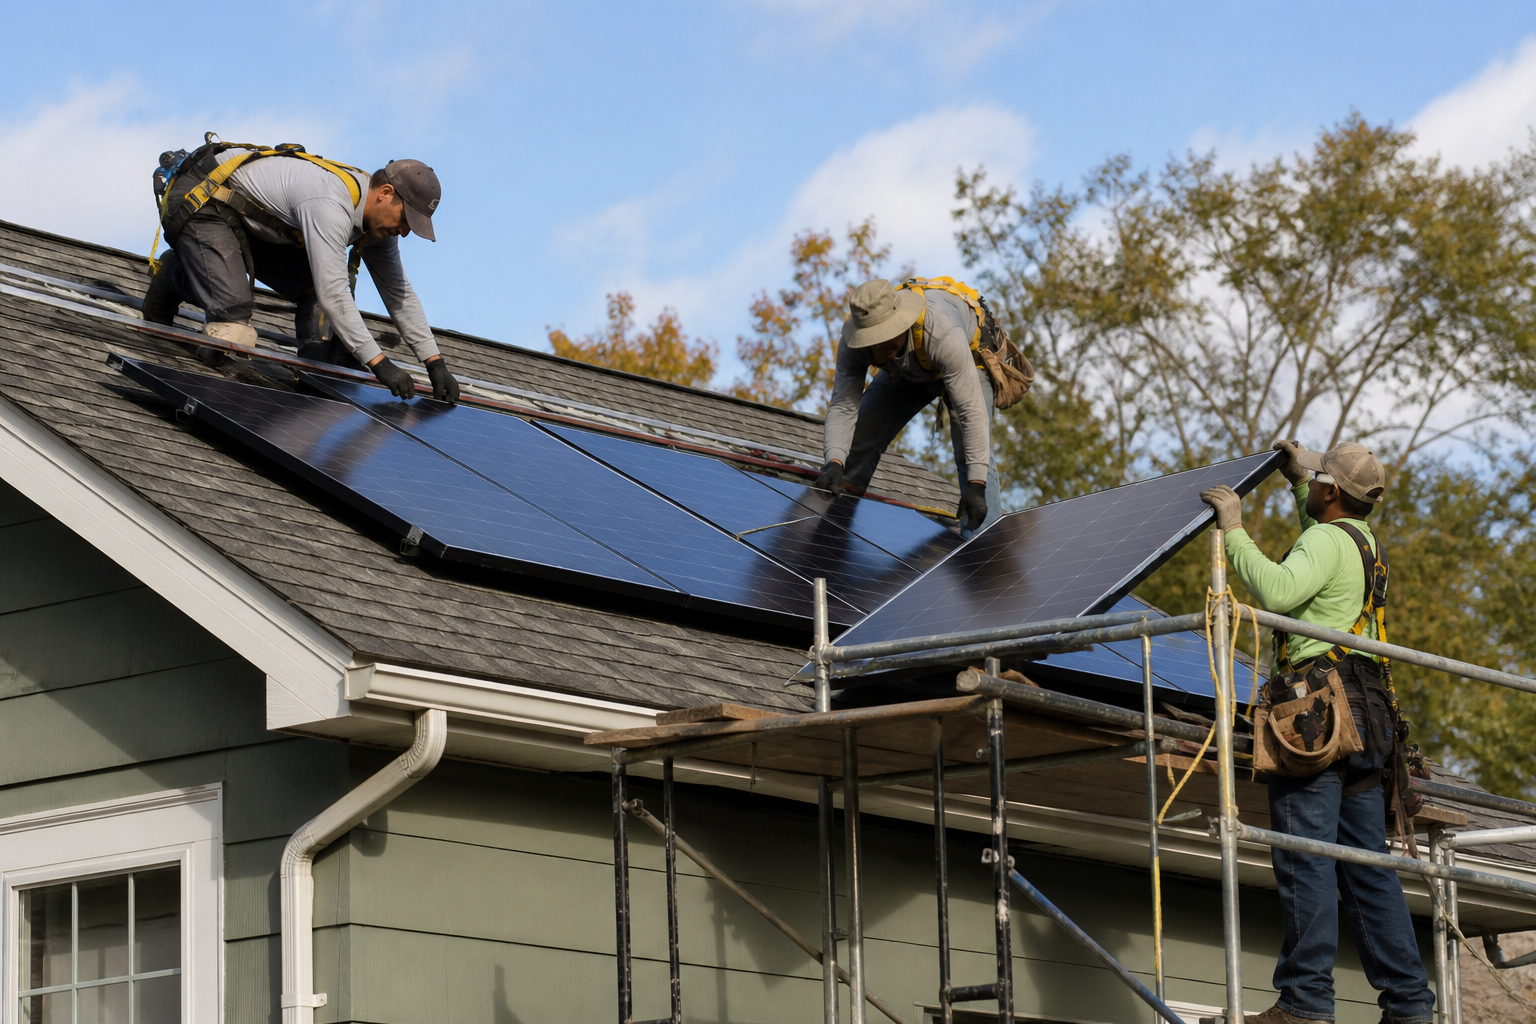
Most homeowners remember the day panels go up on the roof. But the longer and often more frustrating path is the process that bookends that day, design engineering, permits, utility interconnection, inspections, and the elusive permission to operate (PTO). End-to-end, a residential solar installation typically takes 4 to 12 weeks depending on your local authority having jurisdiction (AHJ), utility queue, and whether your roof or electrical panel requires upgrades. Skipping steps or rushing paperwork is how systems sit dark on rooftops for months after physical installation is complete.
A clean process follows a predictable sequence: site survey, engineered design, permit submission, permit approval, physical installation, municipal inspection, utility meter swap or reprogramming, and finally PTO. Each step has a responsible party, you, your installer, the city, or the utility, and delays usually happen at the handoff points between them. The best installers track every milestone and keep you informed without you having to chase them. The worst ones disappear between signing and install day.
Site survey & design
A proper site survey includes roof measurements, structural assessment, electrical panel capacity check, shade analysis using satellite imagery or on-site tools like a Solar Pathfinder, and photographs of the attic, roof surface, electrical panel, and utility meter. Some installers conduct surveys remotely using aerial imagery and permit databases, then confirm details on install day. Remote surveys are faster but can miss issues like undersized rafters, degraded decking, or electrical panels that need upgrading from 100 to 200 amps.
The engineering team then produces a design: panel layout, string configuration or microinverter assignment, wire routing, and structural attachment plan. Push back on designs that ignore chimneys, plumbing vents, skylights, or trees that will grow into the array's sun path over the next decade. A rushed design leads to change orders, delays, and sometimes a system that underperforms the production estimate you were sold on.
Want research like this in your inbox? Become a subscriber, free, no sales pitch.
Become a subscriber →Permits & utility application
Building and electrical permits come from your city or county. The application includes the engineered design, structural calculations, electrical single-line diagram, and equipment specification sheets. Some AHJs process permits in days; others take weeks. A few notoriously slow jurisdictions can stretch to months. Your installer should handle the entire filing and know the local office's requirements, but your contract should clearly state who owns each permit application and who pays re-submission fees if the first attempt is rejected.
Separately, your installer files an interconnection application with the utility. This tells the utility that a generating facility is connecting to their grid and requests permission to export power. Some utilities process interconnection quickly; others, especially those managing a large queue of solar applications, can take four to eight weeks. The interconnection agreement specifies your metering arrangement, export compensation rate, and any required equipment like a revenue-grade production meter or an external disconnect switch.
Pre-install preparation
Before the crew arrives, confirm several things. Is your roof in good condition? If shingles are past their useful life, replacing them after panels are mounted means removing and reinstalling the array at significant cost. Is your electrical panel large enough? A 100-amp main panel may need a 200-amp upgrade to accommodate the solar backfeed, a job that takes a licensed electrician one to two days and costs $1,500 to $4,000. Are there trees that need trimming? Branches within six feet of the array plane should be cut back before installation, not after.
- Confirm roof age and condition, replace shingles before panels, not after.
- Verify main electrical panel amperage and available breaker slots.
- Trim trees and clear roof debris before the crew arrives.
- Arrange for pet containment and vehicle access for the equipment truck.
- Know whether a temporary power shutoff is needed and plan accordingly.
Install day
A typical residential installation takes one to three days depending on system size and roof complexity. Day one is usually racking: the crew lays out rail positions, drills pilot holes, installs flashed roof attachments, and mounts the aluminum rail system. Flashing, the waterproof boot or bracket that seals each roof penetration, is the most critical quality checkpoint. Poorly flashed attachments are the leading cause of post-install leaks. Ask your installer what flashing system they use and whether it's compatible with your roofing material.
Day two focuses on module placement, wiring, and inverter installation. Panels clip or bolt onto the racking rails. Wiring runs from the array down to the inverter location, typically near the main electrical panel on an exterior wall. The inverter connects to a dedicated breaker in your panel. Labeling, required by code, identifies the system's components at the panel, disconnect, and meter. A good crew leaves the site cleaner than they found it, with no loose fasteners, wire scraps, or packaging on the ground.
Inspection & PTO
After physical installation, the city or county inspector visits to verify that the system matches the permitted design, that electrical connections meet code, and that roof attachments are properly flashed and grounded. If the inspection fails, common reasons include labeling errors, missing grounding conductors, or design deviations, the installer corrects the issues and schedules a re-inspection. Put re-inspection responsibility and cost on the installer in your contract.
After passing inspection, the installer submits completion documents to the utility. The utility may install a bidirectional meter, reprogram your existing smart meter, or simply activate your interconnection agreement. Until the utility grants permission to operate, many jurisdictions require the system to remain off or limited to self-consumption. Operating without PTO can violate your interconnection agreement and, in some cases, void your insurance coverage. Patience here is not optional.
Realistic timelines
The honest answer is that timelines vary enormously. In solar-friendly markets with streamlined permitting, parts of Texas, Florida, and Arizona, you might go from signed contract to PTO in four to six weeks. In jurisdictions with heavy permit backlogs or slow utility interconnection queues, parts of the Northeast, Hawaii, and some California utilities, eight to sixteen weeks is realistic. If a sales representative promises "panels on your roof next week" in a slow-permitting jurisdiction, treat it as marketing, not a commitment. Ask for a written milestone schedule with estimated dates for each phase.
Electrical upgrades and structural work
About 15 % to 25 % of residential solar installations require an electrical panel upgrade. Homes built before 1990 frequently have 100-amp or even 60-amp main panels that lack the capacity for solar backfeed under NEC 705 requirements. The 120 % rule, the most common interconnection method, limits the total amperage feeding a busbar to 120 % of its rating. On a 100-amp panel with a 100-amp main breaker, the maximum solar breaker is 20 amps, which caps the array at roughly 3.8 kW. Larger systems require a panel upgrade to 200 amps, costing $1,500 to $4,000 including permit and inspection fees for the electrical work alone.
Structural reinforcement is less common but more expensive when required. Standard residential rafters spaced 16 or 24 inches on center usually handle the added load of a rooftop array, roughly 3 to 4 pounds per square foot for the panels and racking combined. Older homes with undersized or damaged rafters, or flat roofs requiring ballasted non-penetrating mounts, may need structural engineering review and sistered rafters or additional support beams. This work typically costs $1,000 to $5,000 and must be completed before the solar installation begins. Your installer's structural engineer should flag these requirements during the site survey, not on install day.
Permit timeline by region
Permit processing time is one of the most unpredictable variables in the installation timeline. Solar-friendly jurisdictions like parts of Arizona and Texas offer over-the-counter or same-day electronic permits. Mid-tier markets in the Southeast and Midwest typically process within one to three weeks. Notoriously slow AHJs in portions of the Northeast, Hawaii, and certain California counties can stretch to four to eight weeks for the building permit alone, with the utility interconnection queue adding another two to six weeks on top. Your installer should know the typical turnaround for your specific AHJ and utility, if they cannot give you a confident estimate, they may not have enough local experience to manage the process efficiently.
If a sales deck promises "panels next week" in a slow AHJ, treat it as marketing. Ask for a written milestone schedule with estimated dates for permit submission, permit approval, installation, inspection, and PTO. Compare this path with DIY vs pro before you buy kits online.
Common questions
How long is the physical install?+
Often one to three days for a typical residential roof system. Larger systems or complex multi-plane roofs may take an additional day. The physical install is rarely the bottleneck, permitting and utility approval take longer.
Can I stay home during install?+
Usually yes, but expect significant roof noise from drilling and hammering, plus a possible brief power shutoff when the electrician ties the inverter into your main panel. Plan for pets and anyone who works from home to be comfortable with the disruption.
What if inspection fails?+
The installer should correct the deficiency and reschedule the inspection at no additional cost to you. Make sure your contract explicitly states that the installer bears responsibility for re-inspection fees and any delays caused by failed inspections.
Become a subscriber
Free updates on costs, incentives and panel tech, written for homeowners, not sales teams.
Become a subscriber →